Let's 顔面製造!ダンボールとサーボモータで喋る顔面ロボットを作ろう
都内でひっそりOLやってるへっぽこまるこです!
電子工作に入門してサーボモータが動かせるようになったので、顔面ロボット(っぽいもの)を工作してみました!
メインの材料で使う材料はダンボールです!Amazonさんからたくさん届きますよね!ダンボール!!
その他にも身近な材料をかき集めて図工感覚で作れるので、ぜひ試してみてください!
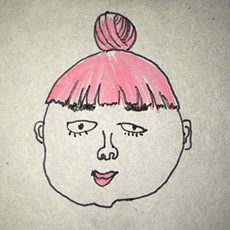
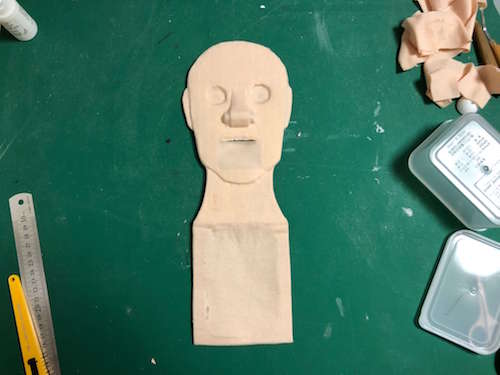
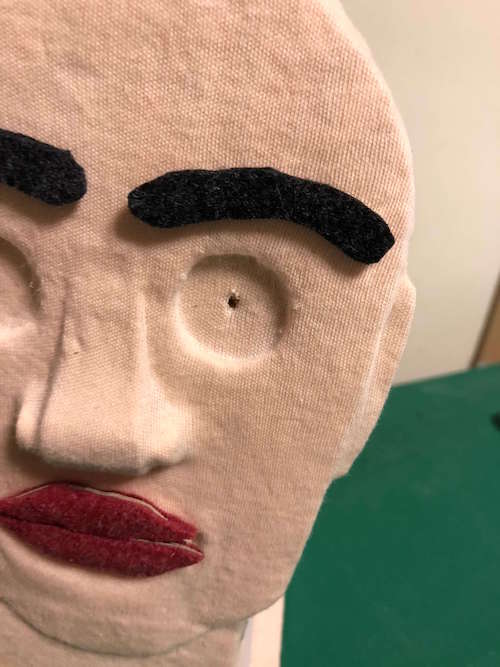
完成イメージ
下記のような動きをもたせると、それっぽい顔面ロボットを作ることができます。
- 目が開閉する
- 目ん玉が左右に動く
- 口が上下に動く
これまでに制作した顔面ロボットの作例は前回記事で紹介しています。
今回は顔面ロボット入門として、喋ってるように口が動くものを作ってみます!
完成イメージはこちら。
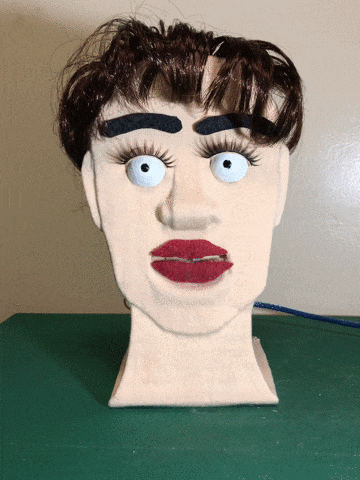 よく見ると下顎(下唇)が上がったり下がったりしてるだけですね?!
これぐらいだったらどうにかできそうだと思いませんか??
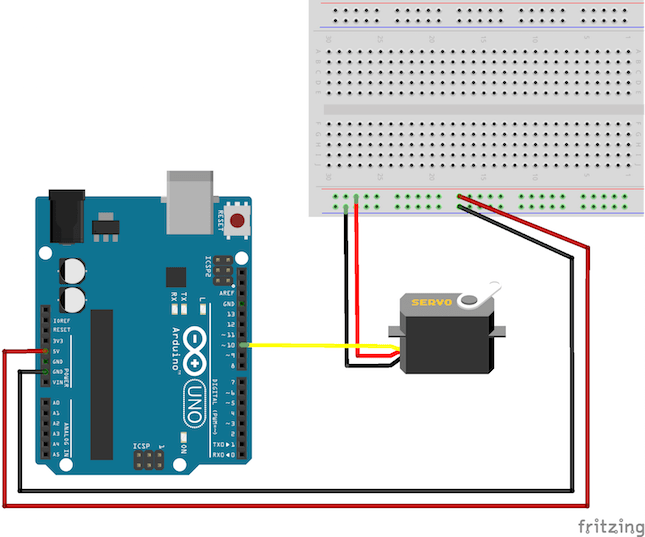
動作の制御はサーボモータ
[
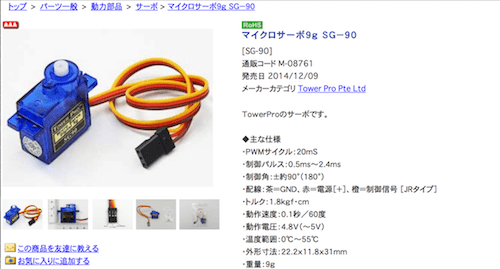

サーボモータは角度を制御できるモジュールですが、取り付けるサーボホーン(サーボモータの羽の部分)にちょっと手を加えることで工作の幅が広がります!
[
Let’s 工作!
設計して切り出す
作りたい顔のイメージを書いて、なんとなくサーボモータなどの位置を掴んでみます。 細かいことはやりながら考えるとして(適当!)、ベースの顔の型紙を作成します。
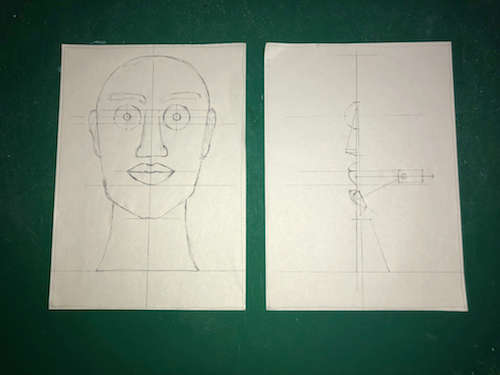
設計図を元に型紙を作成します。
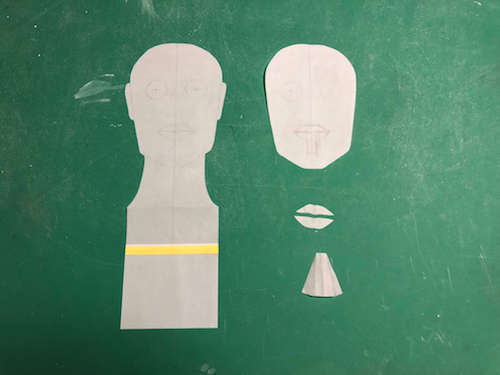
型紙に合わせてダンボールをカットします。
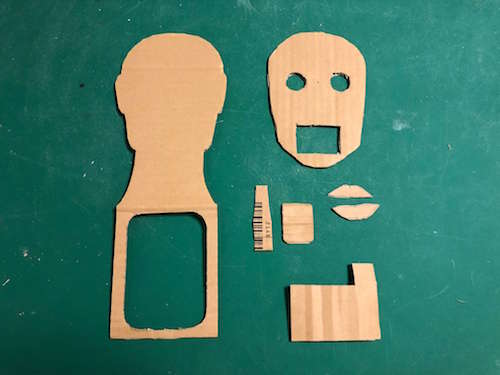
ダンボールのパーツを貼り合わせます。

ダンボールに貼る布に切り込みを入れます。 (口をパクパクさせるためです) ほつれ止めのため、切り込みにはトップコートを塗っておくとよいです。
布を貼り付ける
布を貼って行きます。 ダンボールに適量ボンドを塗り、上から布を被せるように貼っていきます。 ボンドのつけすぎには注意です。
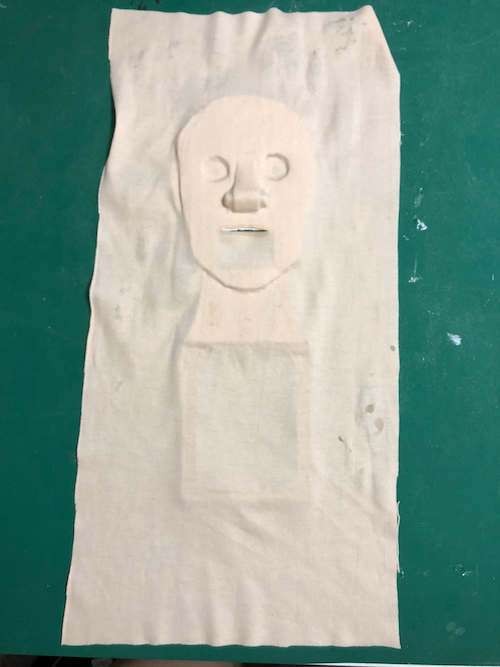
おもて面が全て貼れたら、余った部分を裏面に貼り付け、余分な布をカットします。
一通り貼るとこんな感じです。
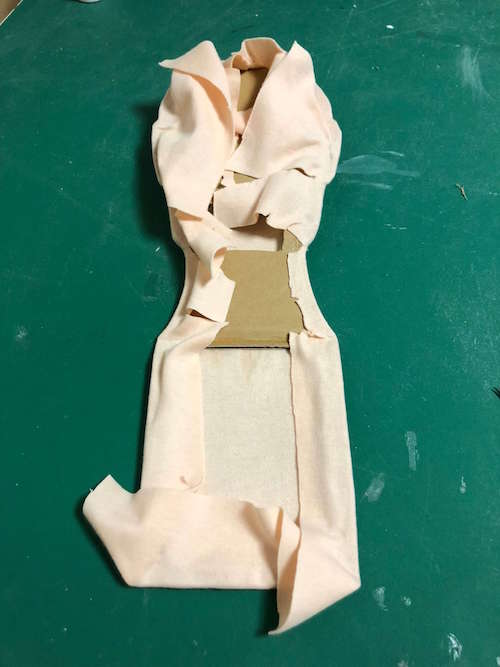
裏面にも布を貼ります。 首が折れそうだったので、竹ひごを入れてついでに補強をしておきます。 また、底面には、百均タッパの蓋をグルーガンで貼っておきます。

サーボホーンを拡張
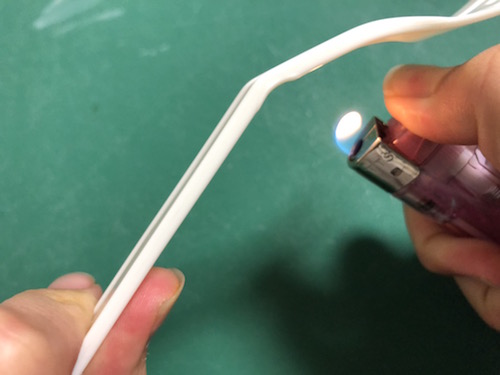
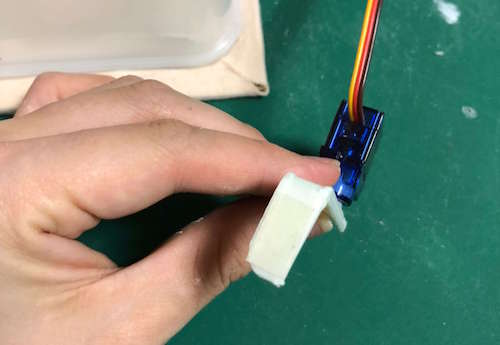
サーボモータで口を動かせるよう、サーボホーンを拡張します。
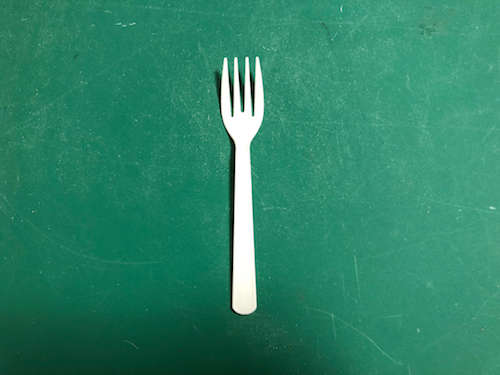
コンビニなんかでもらえるフォークを加工します。
ライターで少しずつ炙ると曲げることができるので、だいたい直角になるように折り曲げます。
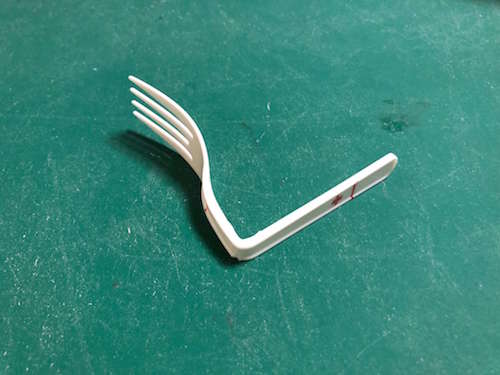
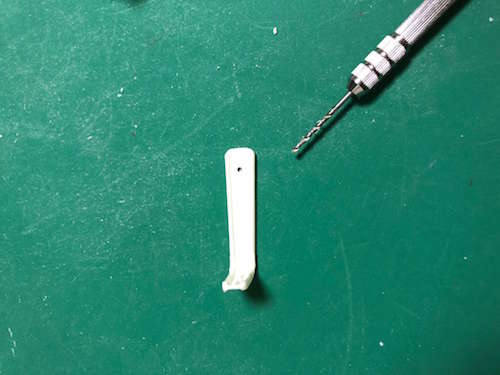
ペンチやカッターなどで必要な長さにカットして、ピンバイスで穴を開けます。 (カットの際は充分に気をつけましょう!)
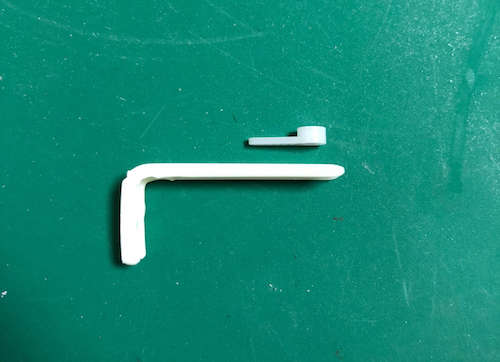
サーボモータに付属しているサーボホーンと今作ったフォークのパーツをくっつけます。
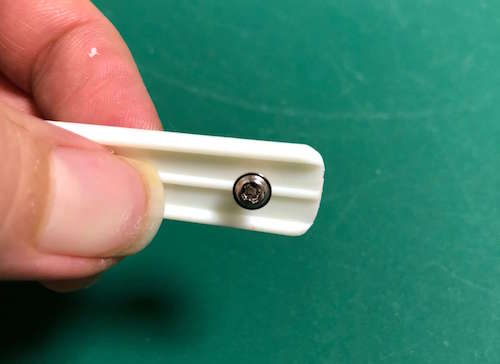
グルーガンで補強しておましょう。

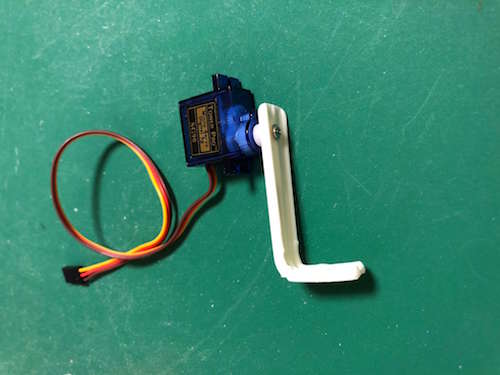
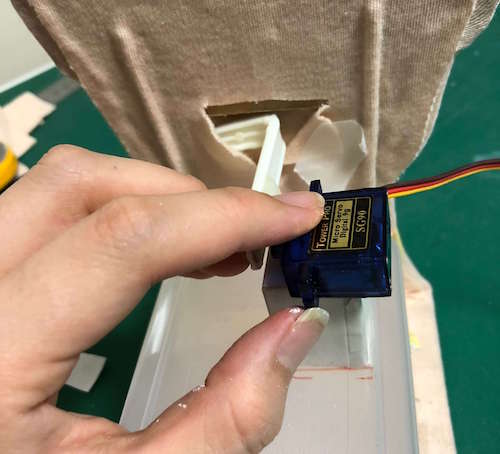
パーツを合体
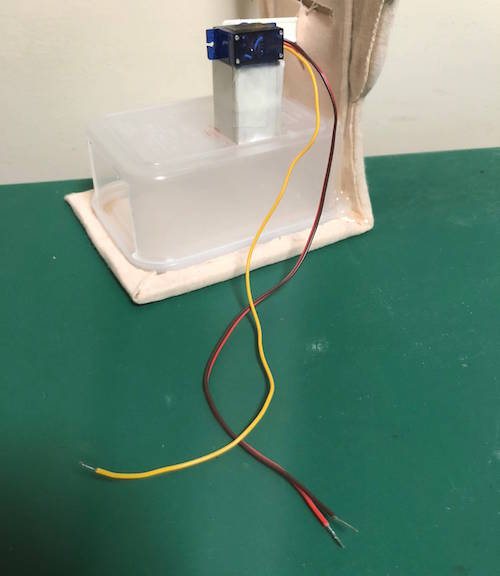
サーボモータを本体と合体させていきます。
裏面から、サーボホーンの先と下唇にあたる部分の接着部分を確認します。
強力粘着テープで貼り付けます。
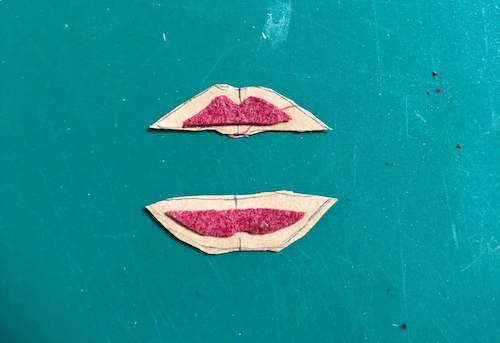
唇と顔パーツを貼り付け
唇を作ります。唇に厚みをもたせるため、唇の形にカットしたダンボールに、一回り小さい赤のフェルトを貼ります。
上から再度フェルトを貼ります。
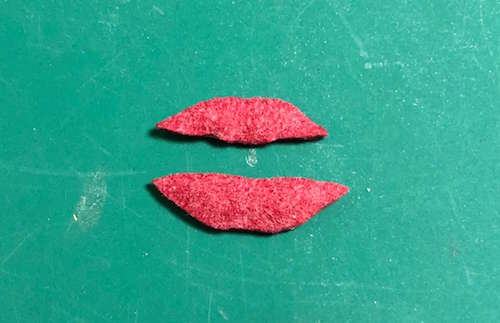
おもて面から唇をグルーガンなどで接着します。

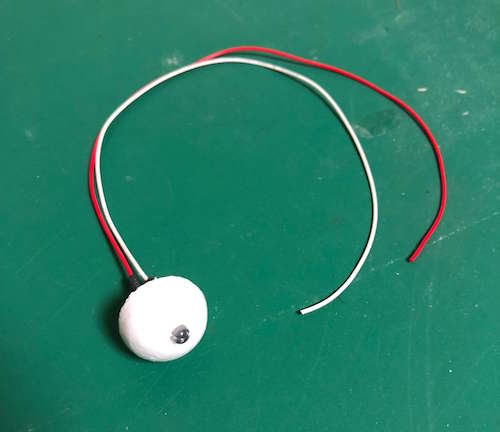
お好みで口以外の顔のパーツを貼り付けます。
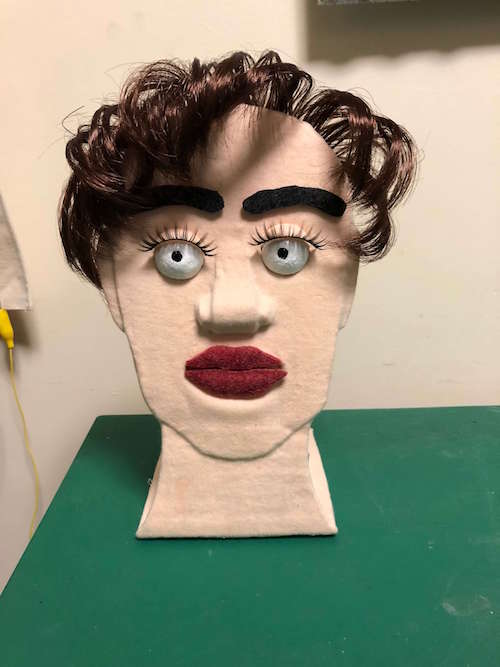
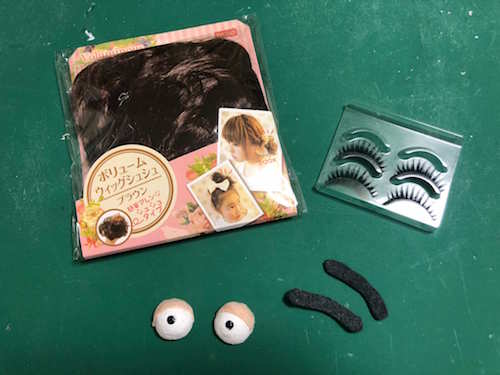
私は、目(発泡スチロールの球を加工)、眉毛(フェルトをカット)、まつ毛(百均のつけまつ毛)と髪の毛(百均の付け毛)を用意してみました!
サーボモータを動かすプログラム
以下のようなプログラムを準備して、マイコンボードに書き込んでおきます。
# include <Servo.h>

Servo myservo;
int pos = 0;

void setup() {
  myservo.attach(9);
}

void loop() {
  for (pos = 0; pos <= 25; pos += 1) {
    myservo.write(pos);
    delay(5);
  }
  for (pos = 25; pos >= 0; pos -= 1) {
    myservo.write(pos);
    delay(5);
  }
  for (pos = 0; pos <= 25; pos += 1) {
    myservo.write(pos);
    delay(5);
  }
  for (pos = 25; pos >= 0; pos -= 1) {
    myservo.write(pos);
    delay(5);
  }
    delay(20);
}
配線して動作を調整
サーボモータから出ている3つの線の先端をカットします。
先端の皮を1センチほど向いて、こよりのように撚り合せます。
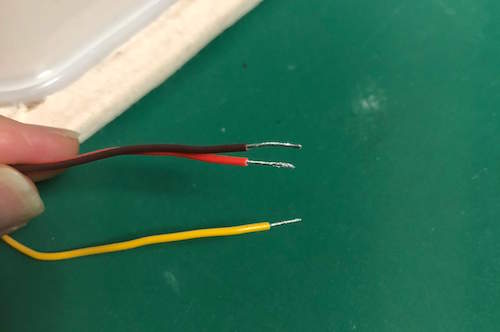
マイコンボードに配線します。
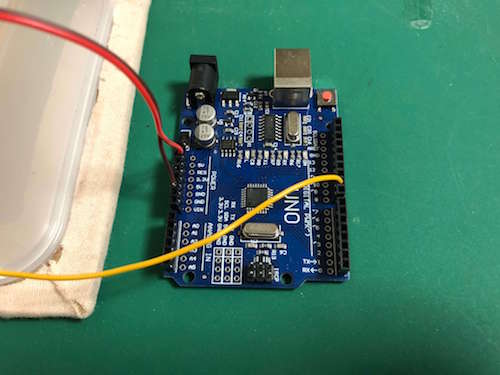
制御を微調整します。
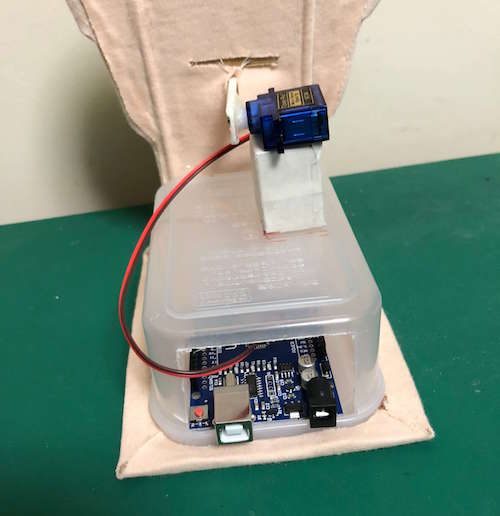
試してみる
動かします!

まとめ
図工感覚で電子工作して動くものができました!
サーボモータを増やしたりスピーカをつけたりと、同じような機構でさまざまな工夫ができます。
イベントの受付や、お子さんとの工作のネタにいかがでしょうか?!ぜひ、いろんなオリジナルの顔面を作ってみてください!!
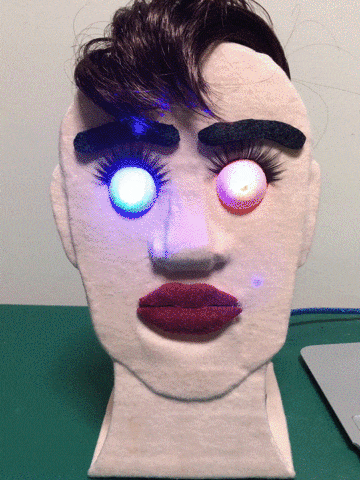
おまけ:パリピモード
目ん玉を加工して瞳にマイコン内臓フルカラーLED(HIGHにするとランダムに光るもの)を埋め込んで……
ぶっさします……
Arduinoのデジタル出力ピン(今回は11と12)にLEDを接続してプログラムを書き込み……
動かします!